
Mining Bitcoin for Fun and (Basically No) Profit, Part 2: The Project
byIf you have not yet, please read the first article in this series: Mining Bitcoin for Fun and (Basically No) Profit, Part 1: Introduction
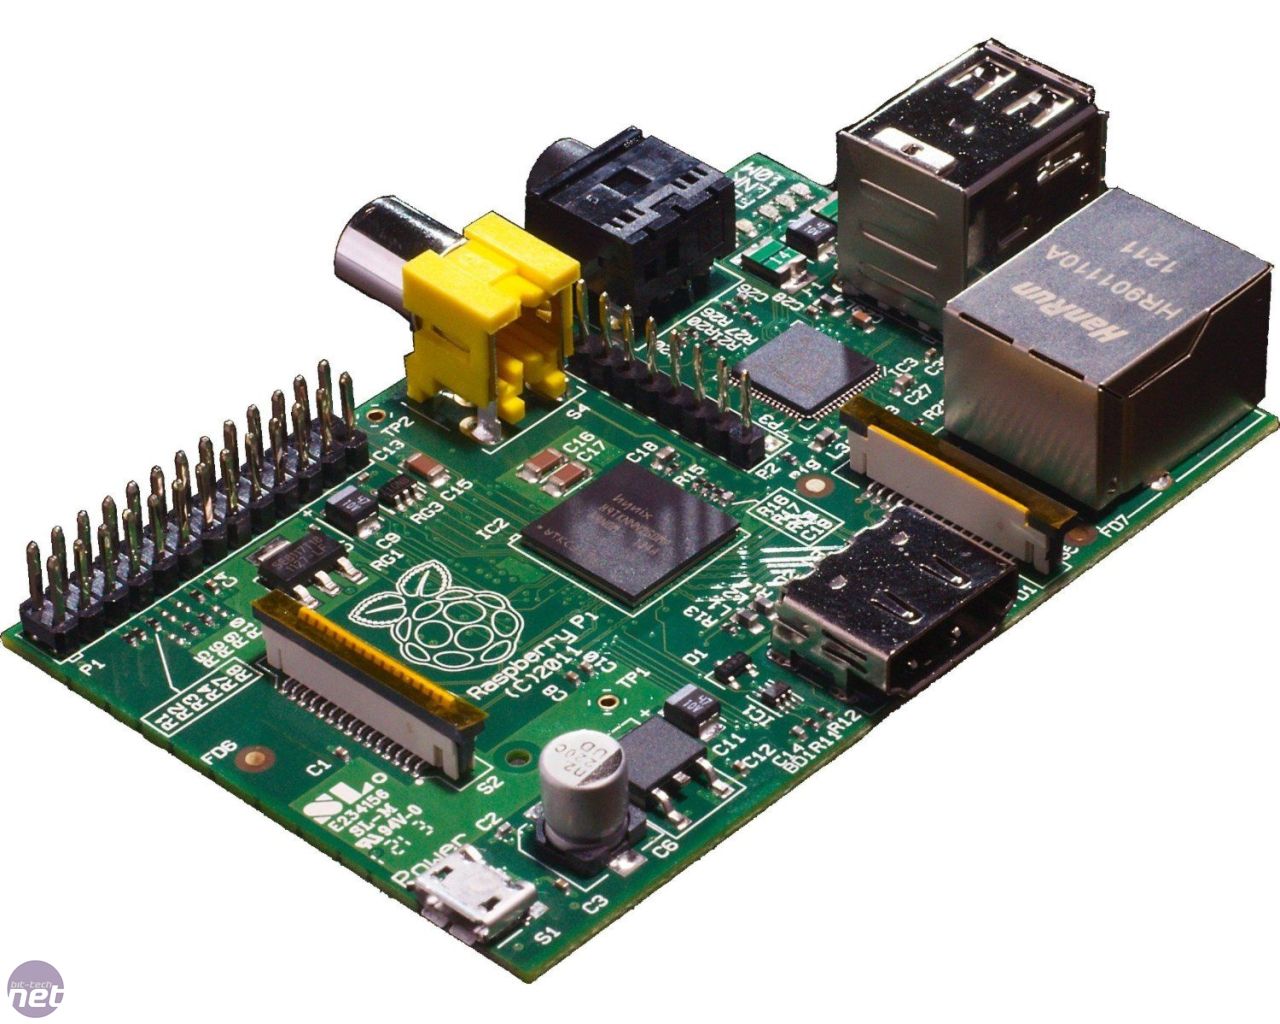
I have a few Raspberry Pis around my house that I like to play with - four in total. Prior to this idea of a Bitcoin project, I had one running as a media center and another operating as a PBX. Of the remaining two, one was an early model B with 256MB of RAM while the other was the shiny new revision sporting 512MB. I wanted to save the revised model for the possibility of a MAME project, so I decided to put the other, older one to work. It would help me on my quest to mine bitcoins.
But what is mining exactly you may ask? Bitcoin works on a system of verified transactions achieved through a distributed consensus (a mouthful I know). Every transaction is kept as a record on the Bitcoin block chain. Mining is more or less the process of verifying a “block” of these transactions and appending them to the chain. These blocks have to fit strict cryptographic rules before they can be appended, else blocks could be modified and invalidated. When someone properly generates one of these blocks, the system pays them in a certain amount of bitcoins (currently 25). This process repeats every ten minutes.
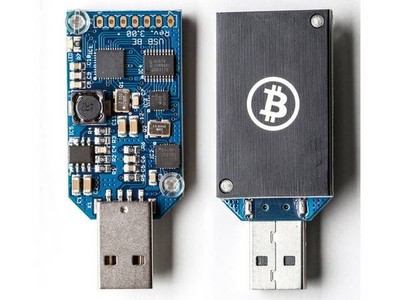
I knew that at this stage in the mining game I had to go with an ASIC setup and I new I wanted to run it off of my Raspberry Pi. Simple enough. The Raspberry Pi is a fantastic platform for this considering its price, power consumption, and horsepower. For mining hardware, I decided to buy the cheapest ASIC miners I could get my hands on. I found the ASICminer USB Block Eruptor Sapphire for the low price of $45 on Amazon. They cost more money on eBay and I couldn’t buy them from any sellers with Bitcoin because I didn’t have any (and didn’t want to bother with exchanges) so this seemed like the way to go. The Block Eruptor could run at ~330MHash/s, which is pretty hefty compared to GPU mining and at a fraction of the price. It is also pretty low power, using only 2.5 watts.
So I figured that I would get one of those, but also devised a more complete and formal parts list:
- 1 x Raspberry Pi
- 1 x ~4GB SD Card
- 1 x Micro USB Cable
- 1 x Network Cable
- 1 x Powered USB HUB
- n x USB Block Eruptor
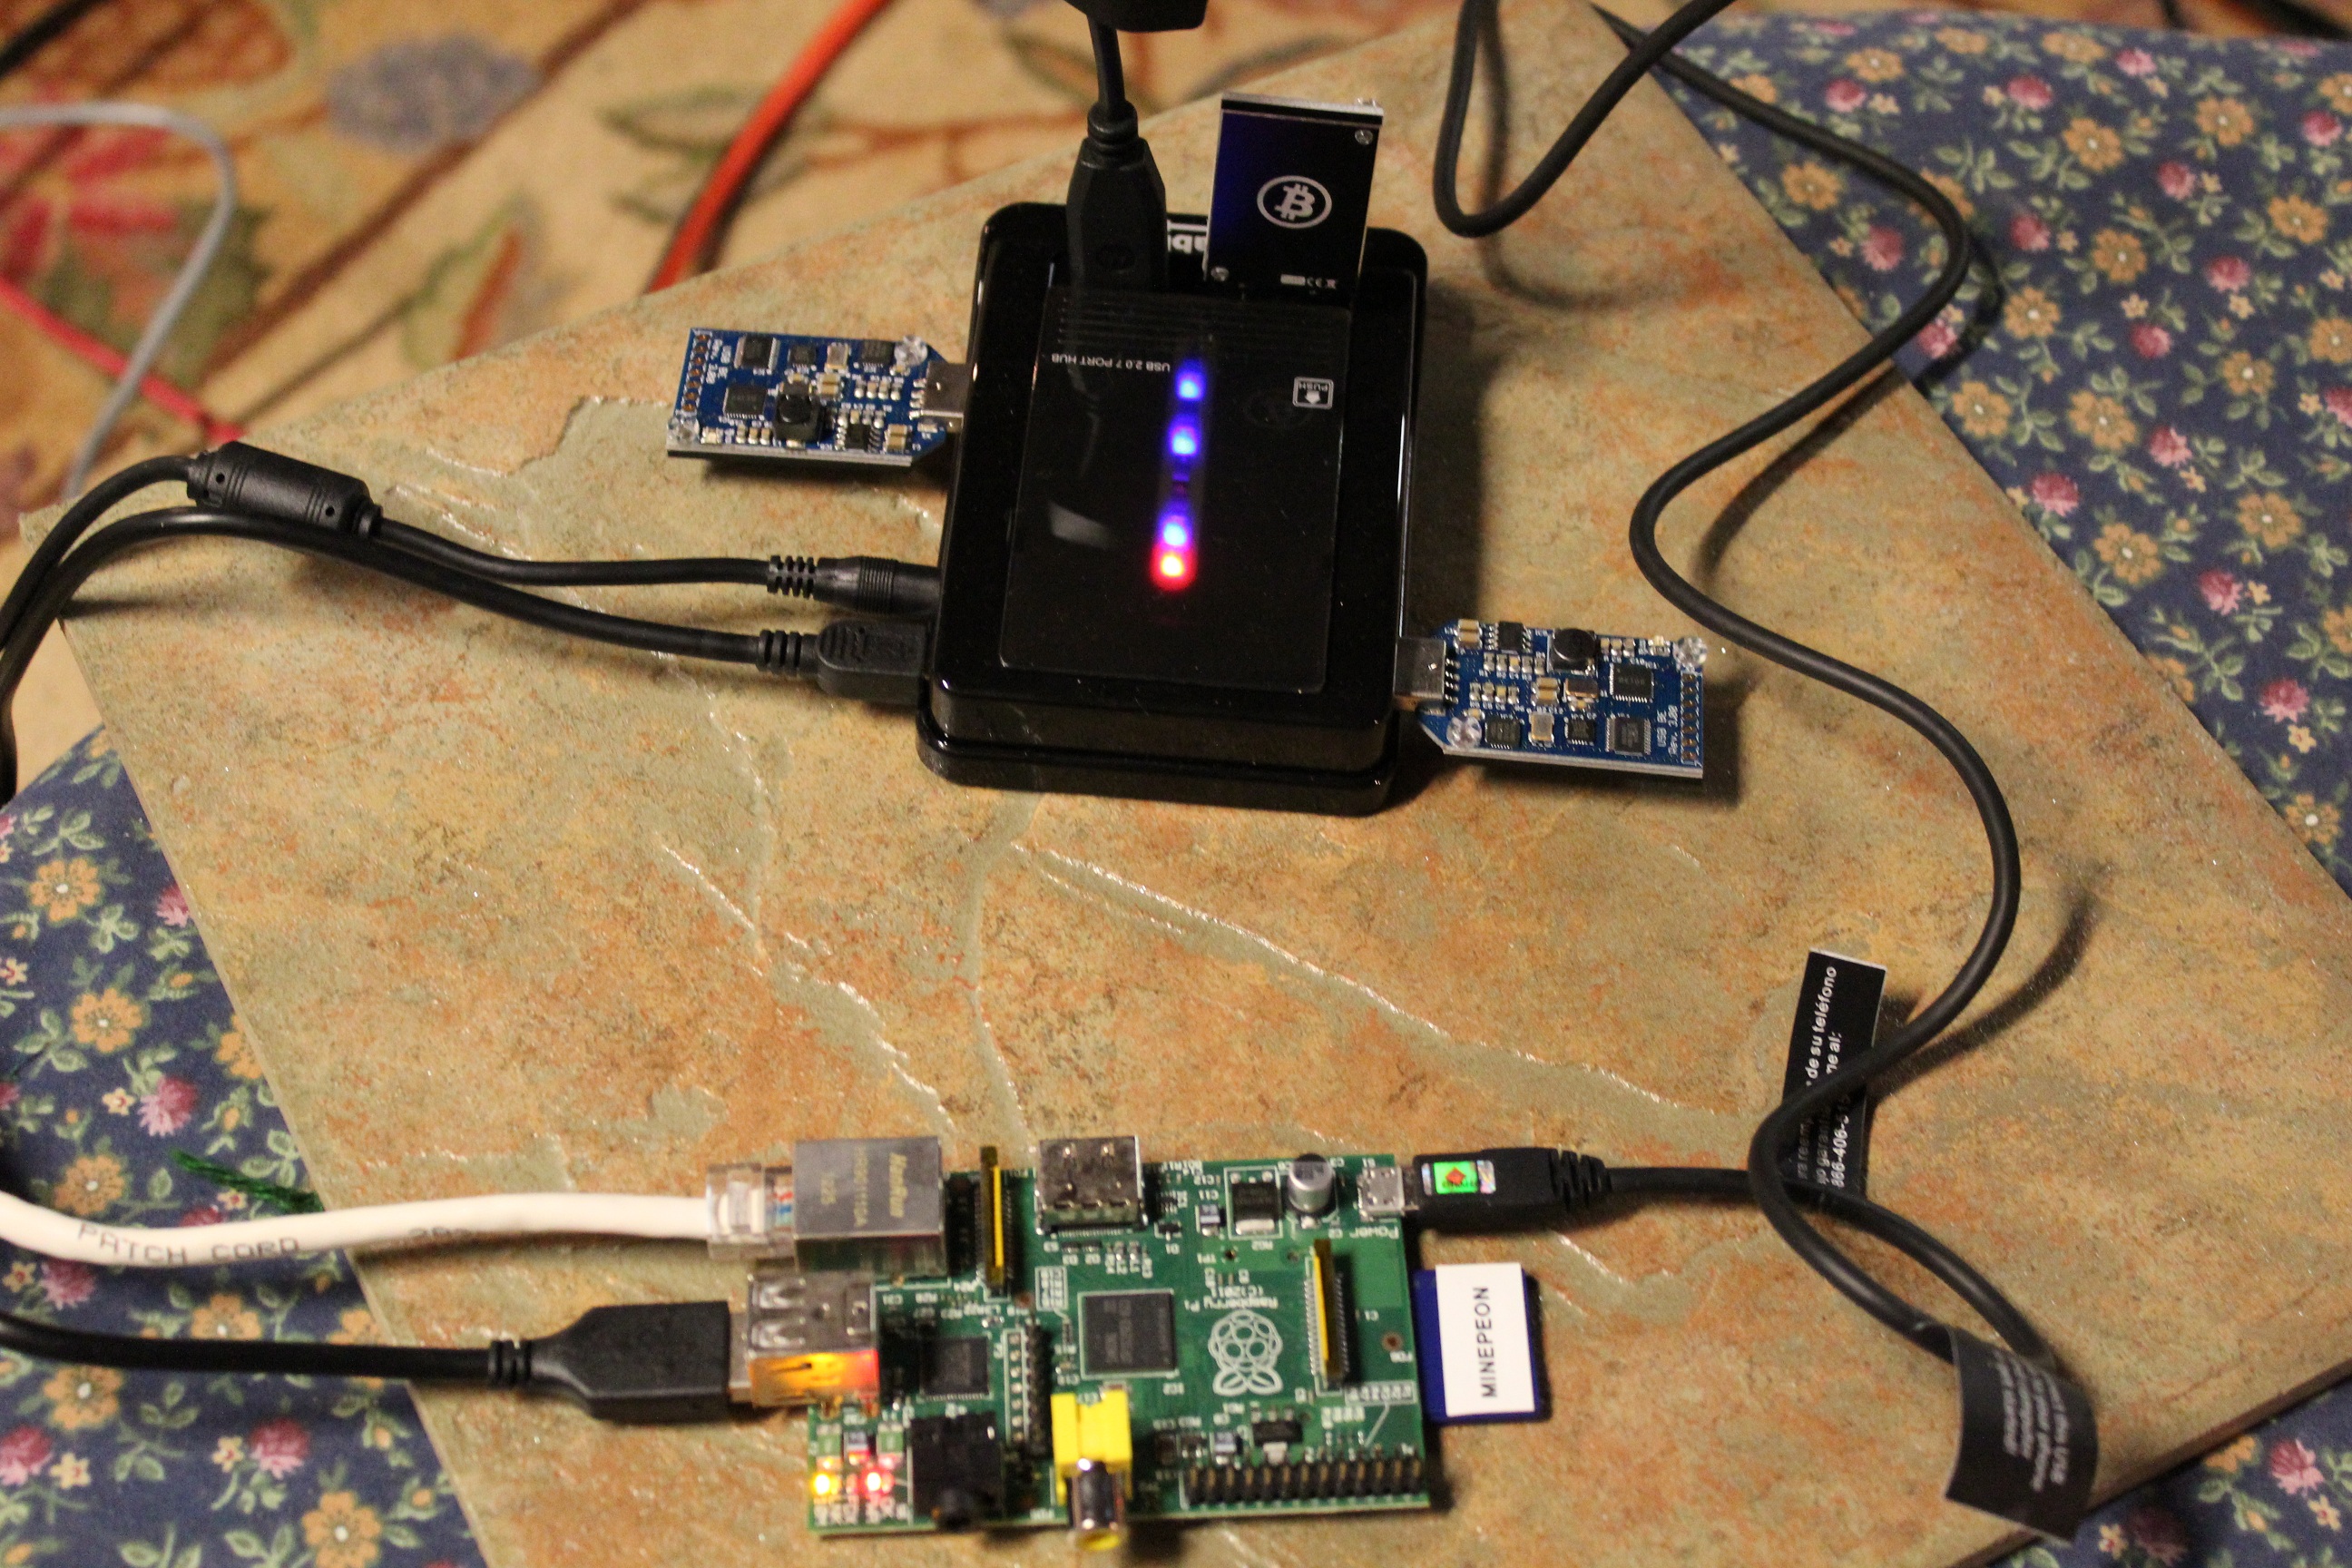
That’s the basics of it. I already had the Raspberry Pi, and the necessary cables and SD card. These were just lying around. I needed to purchase a USB hub, so I bought a 7-port model for about $20. The hub needs to be powered as it will be running both the Raspberry Pi and the USB Block Eruptor. Considering power, the Raspberry Pi claims to draw somewhere around 1-1.2 Amps maximum while the USB Block Eruptor claims to draw 500 milliAmps maximum. I tested things out using my Kill A Watt and found that my setup with the USB hub, Raspberry Pi, and three USB Block Eruptors draws only 170 milliAmps and uses only 12.5 watts! So the projected power usage seems off for me, but I can’t guarantee the same results for you.
After buying my USB Block Eruptor on Amazon, I got it in about a week. The day after I got it and made sure it was working, I ordered two additional units to fill out the hub a little more.
Software
To do anything with Bitcoin, we’re first going to need a wallet and a Bitcoin address. Which wallet software you use is up to you. For desktop apps, there is the original Bitcoin-qt, MultiBit, and other third-party wallets. There are mobile applications like Bitcoin Wallet for Android, and even web-based wallets like BlockChain that store your bitcoins online. Figure out what client works best for you and use it to generate your Bitcoin address. The address is a series of alphanumeric characters that act as a public key for anyone to send bitcoins to. This address is also linked to a private key, not meant to be distributed, which allows the address holder to transfer funds.
In order to use the USB Block Eruptor, we’re going to need mining software. One great thing about using the Raspberry Pi as a platform is that someone has already made a Bitcoin mining operating system called MinePeon, built on Arch Linux. The distribution combines existing mining packages cgminer and BFGminer with a web-based GUI and some nice statistical elements. You’re going to need to download this.
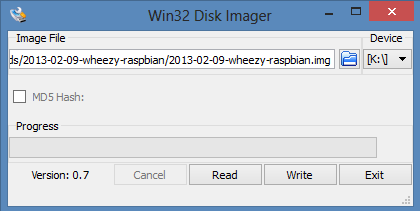
To copy the operating system image file onto the SD card for your Raspberry Pi, insert the card into your computer and format it with the application of your choosing. Since I did this with a Windows system, I used Win32 Disk Imager. It is fairly straight forward: choose the image file, choose the drive letter, hit write, and you’re done.
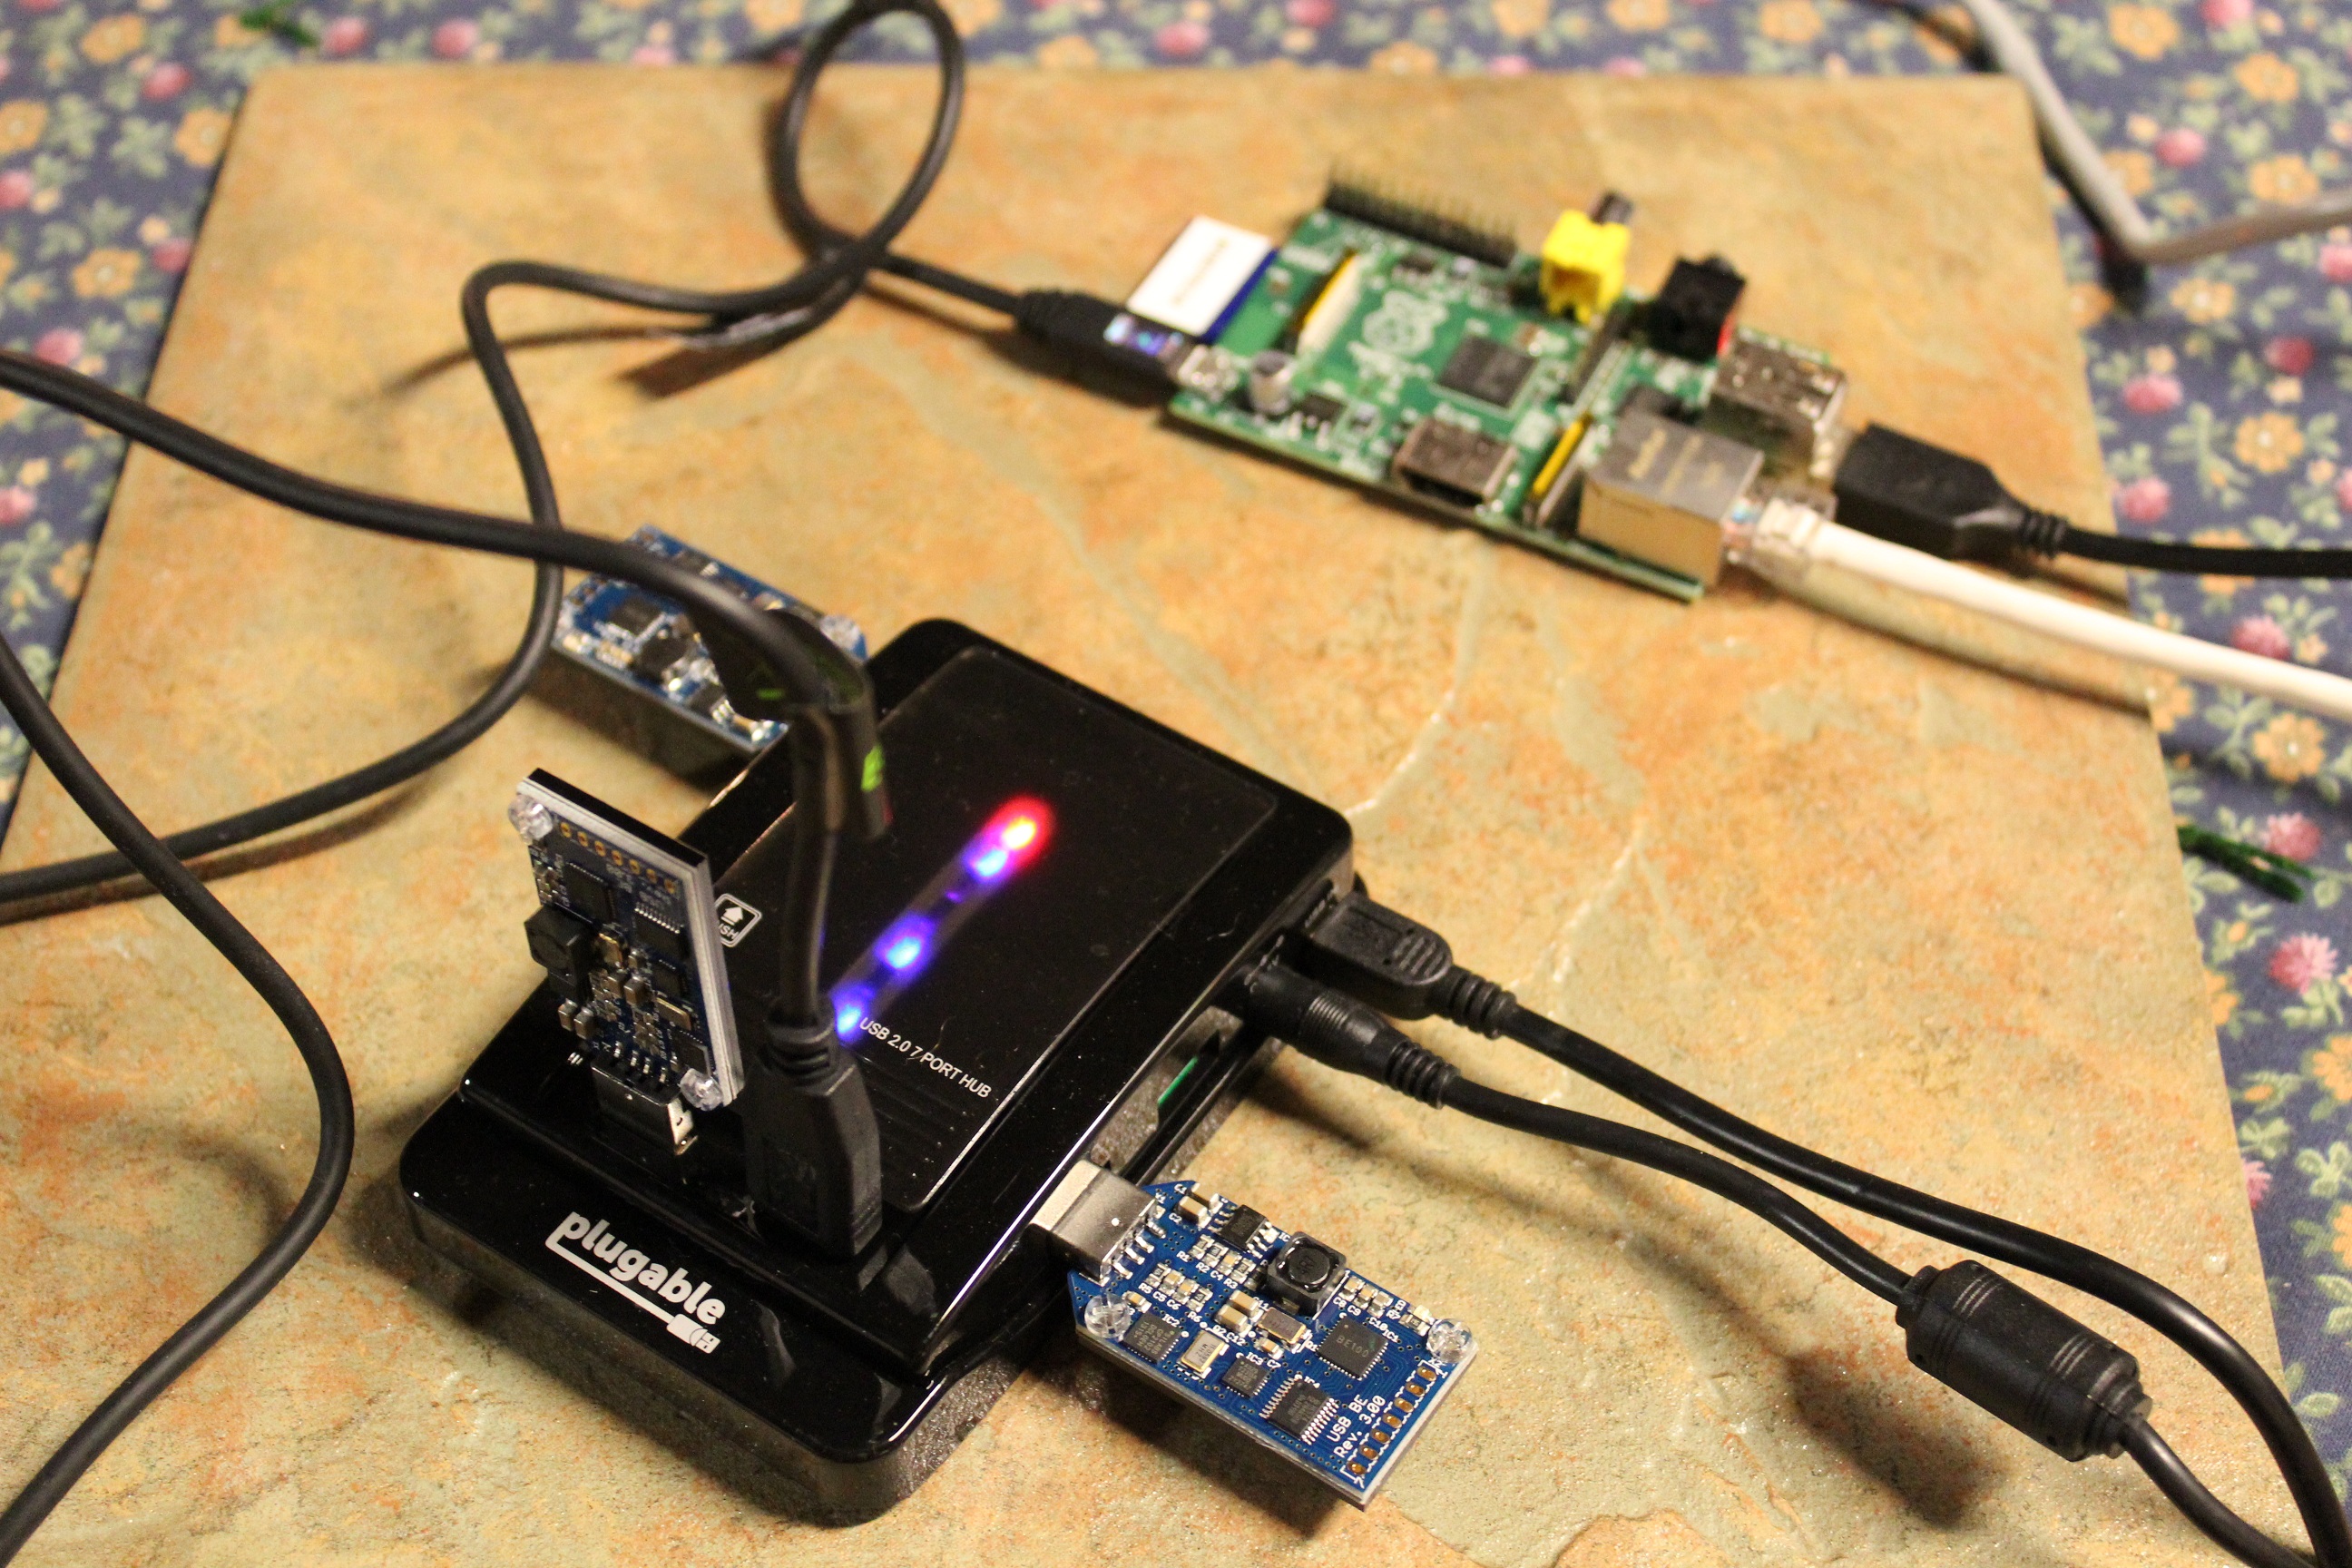
Okay, software is ready. Now to set up the Raspberry Pi, insert the SD card into the Pi’s slot. To power the Pi, plug your Raspberry Pi into one of the USB ports via Micro USB cable. Then, plug the USB hub into one of your Raspberry Pi’s free USB ports. Any USB Block Eruptors you have can be plugged into the remaining USB ports on the hub (not the Raspberry Pi directly), but keep heat flow in mind as they get pretty hot. Next, connect the Raspberry Pi to your home network. Finally, plug your hub’s power cord in and let the Pi boot up.
To go any further, you will need to determine your Raspberry Pi’s IP address. If your router allows for it, the easiest way is to log in to it and look for the new device on your network list. Alternatively, plug a monitor or television into your Raspberry Pi and log directly into the system using minepeon as the user and peon as the password. From there, run the ifconfig command to retrieve the internal IP address.
Navigate to MinePeon’s web interface by typing the IP address in your browser. You’ll have to log in to the web interface using the previously defined credentials: minepeon as the user and peon as the password. You should be presented with a screen similar to this (But without the graphs filled in):
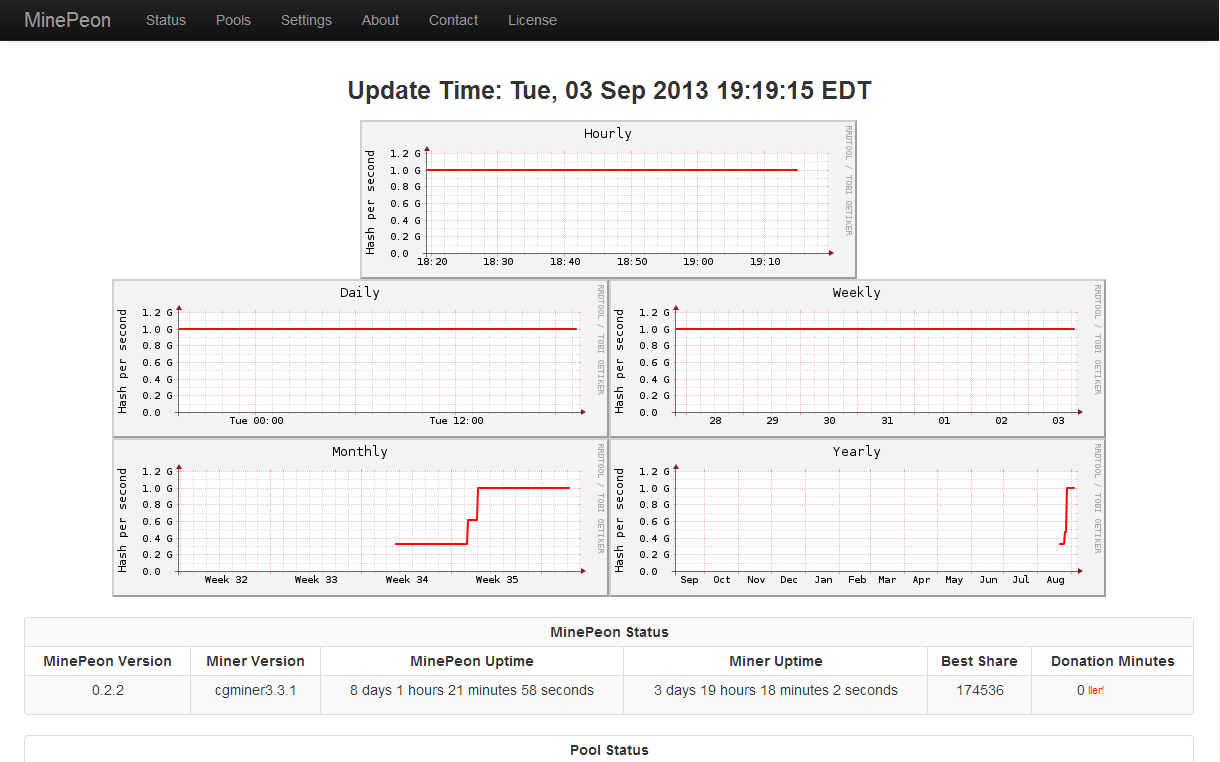
If you receive an in-line error about the graphs not being found, don’t worry. You just need to get mining and they will generate automatically, making the message go away.
Configuration
In order to utilize the software, you will now need to register with one or more Bitcoin mining pools. Mining pools work using distribution. The pool you are connected to will track the progress of each user’s attempt at solving a block for the block chain. On proof of an attempt at solving the next block, the user is awarded a share. At the end of the round, any winnings are divided among users based on how much power (how many shares) they contribute. Why use a mining pool at all? Payout usually only happens for one user when a block is solved. It can be very difficult for a user to mine a bitcoin, even after months of trying as the odds of success are always the same. Mining independently offers the opportunity of a giant payout at some point, but pooled mining offers smaller, more regular payouts.
Mining pools can differ greatly in how the payout is divided. I’d advise that you do some research as to which method works best for you. Alternatively, you could go about setting up your own mining pool, but I wouldn’t advise it without a substantial amount of processing power unless you’re willing to wait for a payout (if it even comes at all).
Anyway, I chose two mining pools: Slush’s pool (my primary) and BTC Guild (my fail-over in case my primary is down).
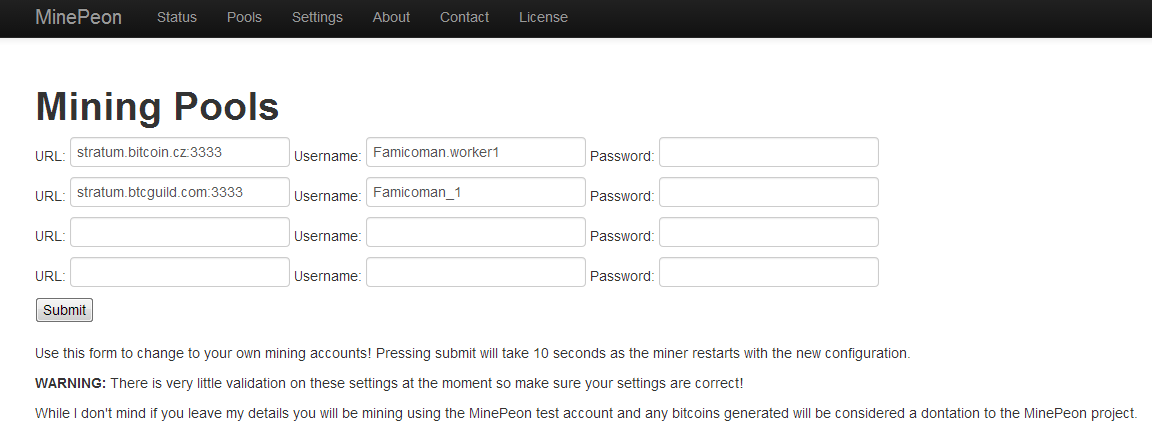
Registering with a mining pool is as simple as registering with any other website. After completing registration, you will be supplied with a worker name/password and the server address. These credentials can then be pushed into the MinePeon Pools configuration like so:
Next go to the Settings page and change your password for the MinePeon web interface (it’s a good idea), the timezone (this is buggy right now and won’t look like it’s working on the settings page) and any time you want to donate to the MinePeon maintainer (if any).

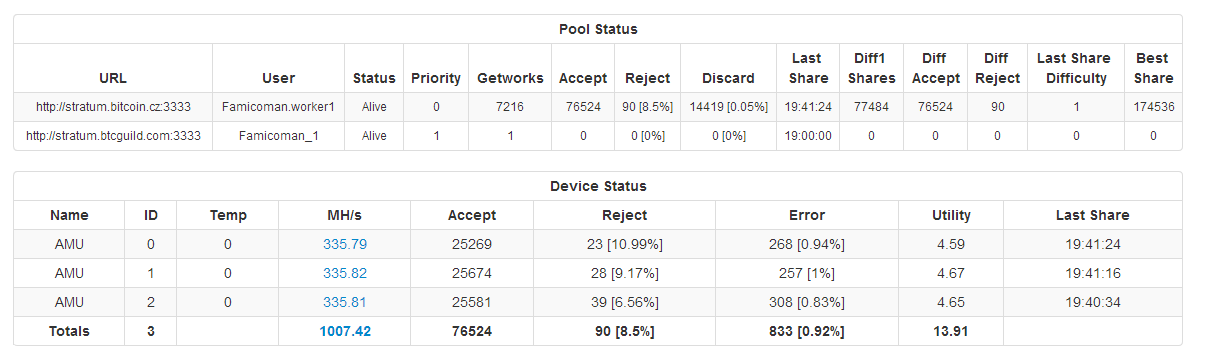
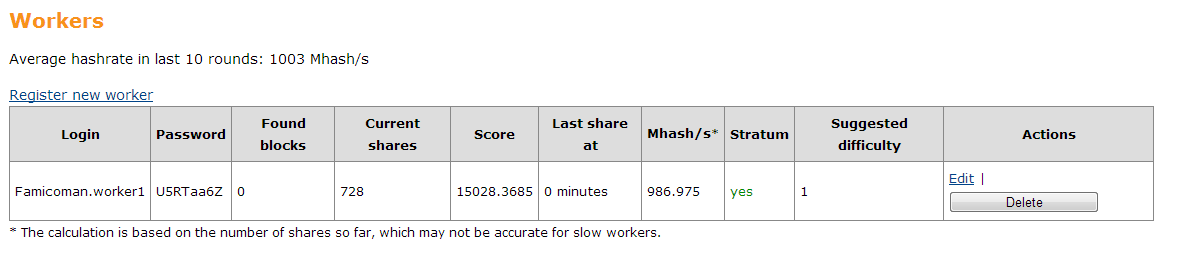
If everything is configured correctly, within a few hours (or instantly), you should see some activity on your MinePeon Status screen. Additionally, be sure to check your account on the mining pool you signed up with to make sure everything is working as expected.
Now, just sit back and let your machine go to town. The only thing you have to do at this point is make sure the USB hub continues to get power (don’t let anyone unplug it) and it should run continuously. On your first day or two, it may take a while before your status update and payout will take even longer.
Most mining pools offer status tracking for your payout, so you should be able to see how things are progressing fairly quickly. As of this article being published, I receive a payout of 0.01 Bitcoin near every 24-30 hours while running three USB Block Eruptors.